
Four Pass Loop - Backpacking - Maroon Bells

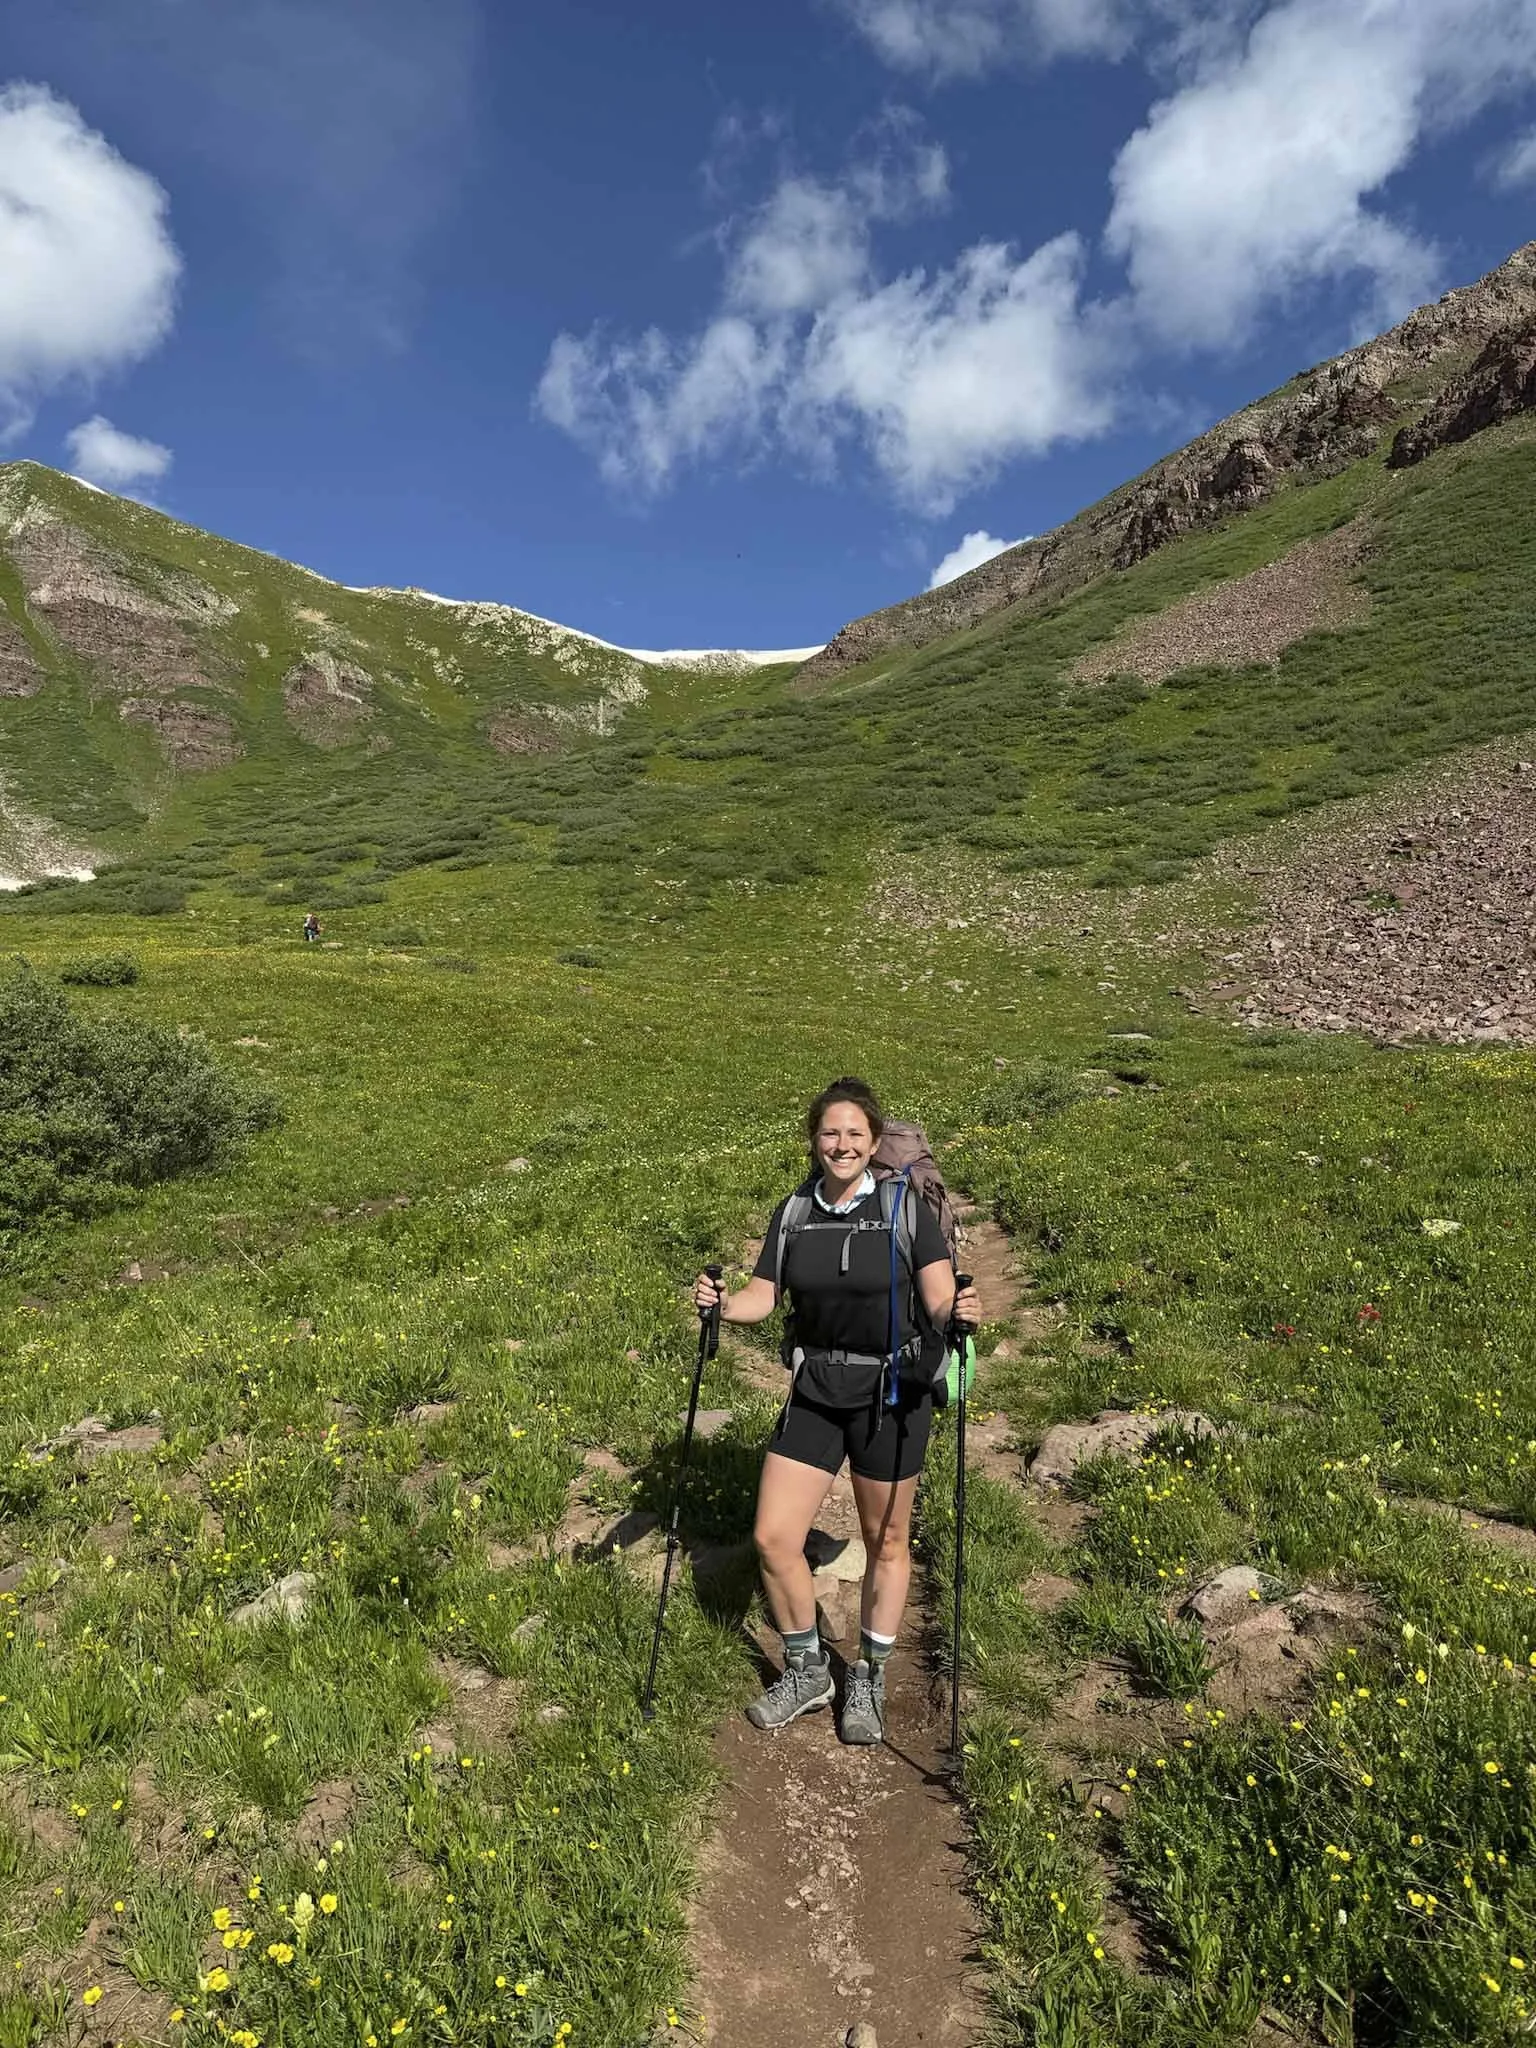
View of the Maroon Bells at the start of the Four Pass Loop Hike
The Four Pass Loop
is a premier backpacking route that offers some of the most breathtaking alpine scenery in the Rockies. This 26-mile (minimum) adventure will push your limits as you conquer four epic 12,000-foot passes—Buckskin, Trail Rider, Frigid Air, and West Maroon—gaining roughly 8,000 feet in elevation along the way.
While some trail runners tackle this beast in a single day (yes, really), most backpackers opt for a more immersive experience, spending 3 to 5 days soaking in its beauty.
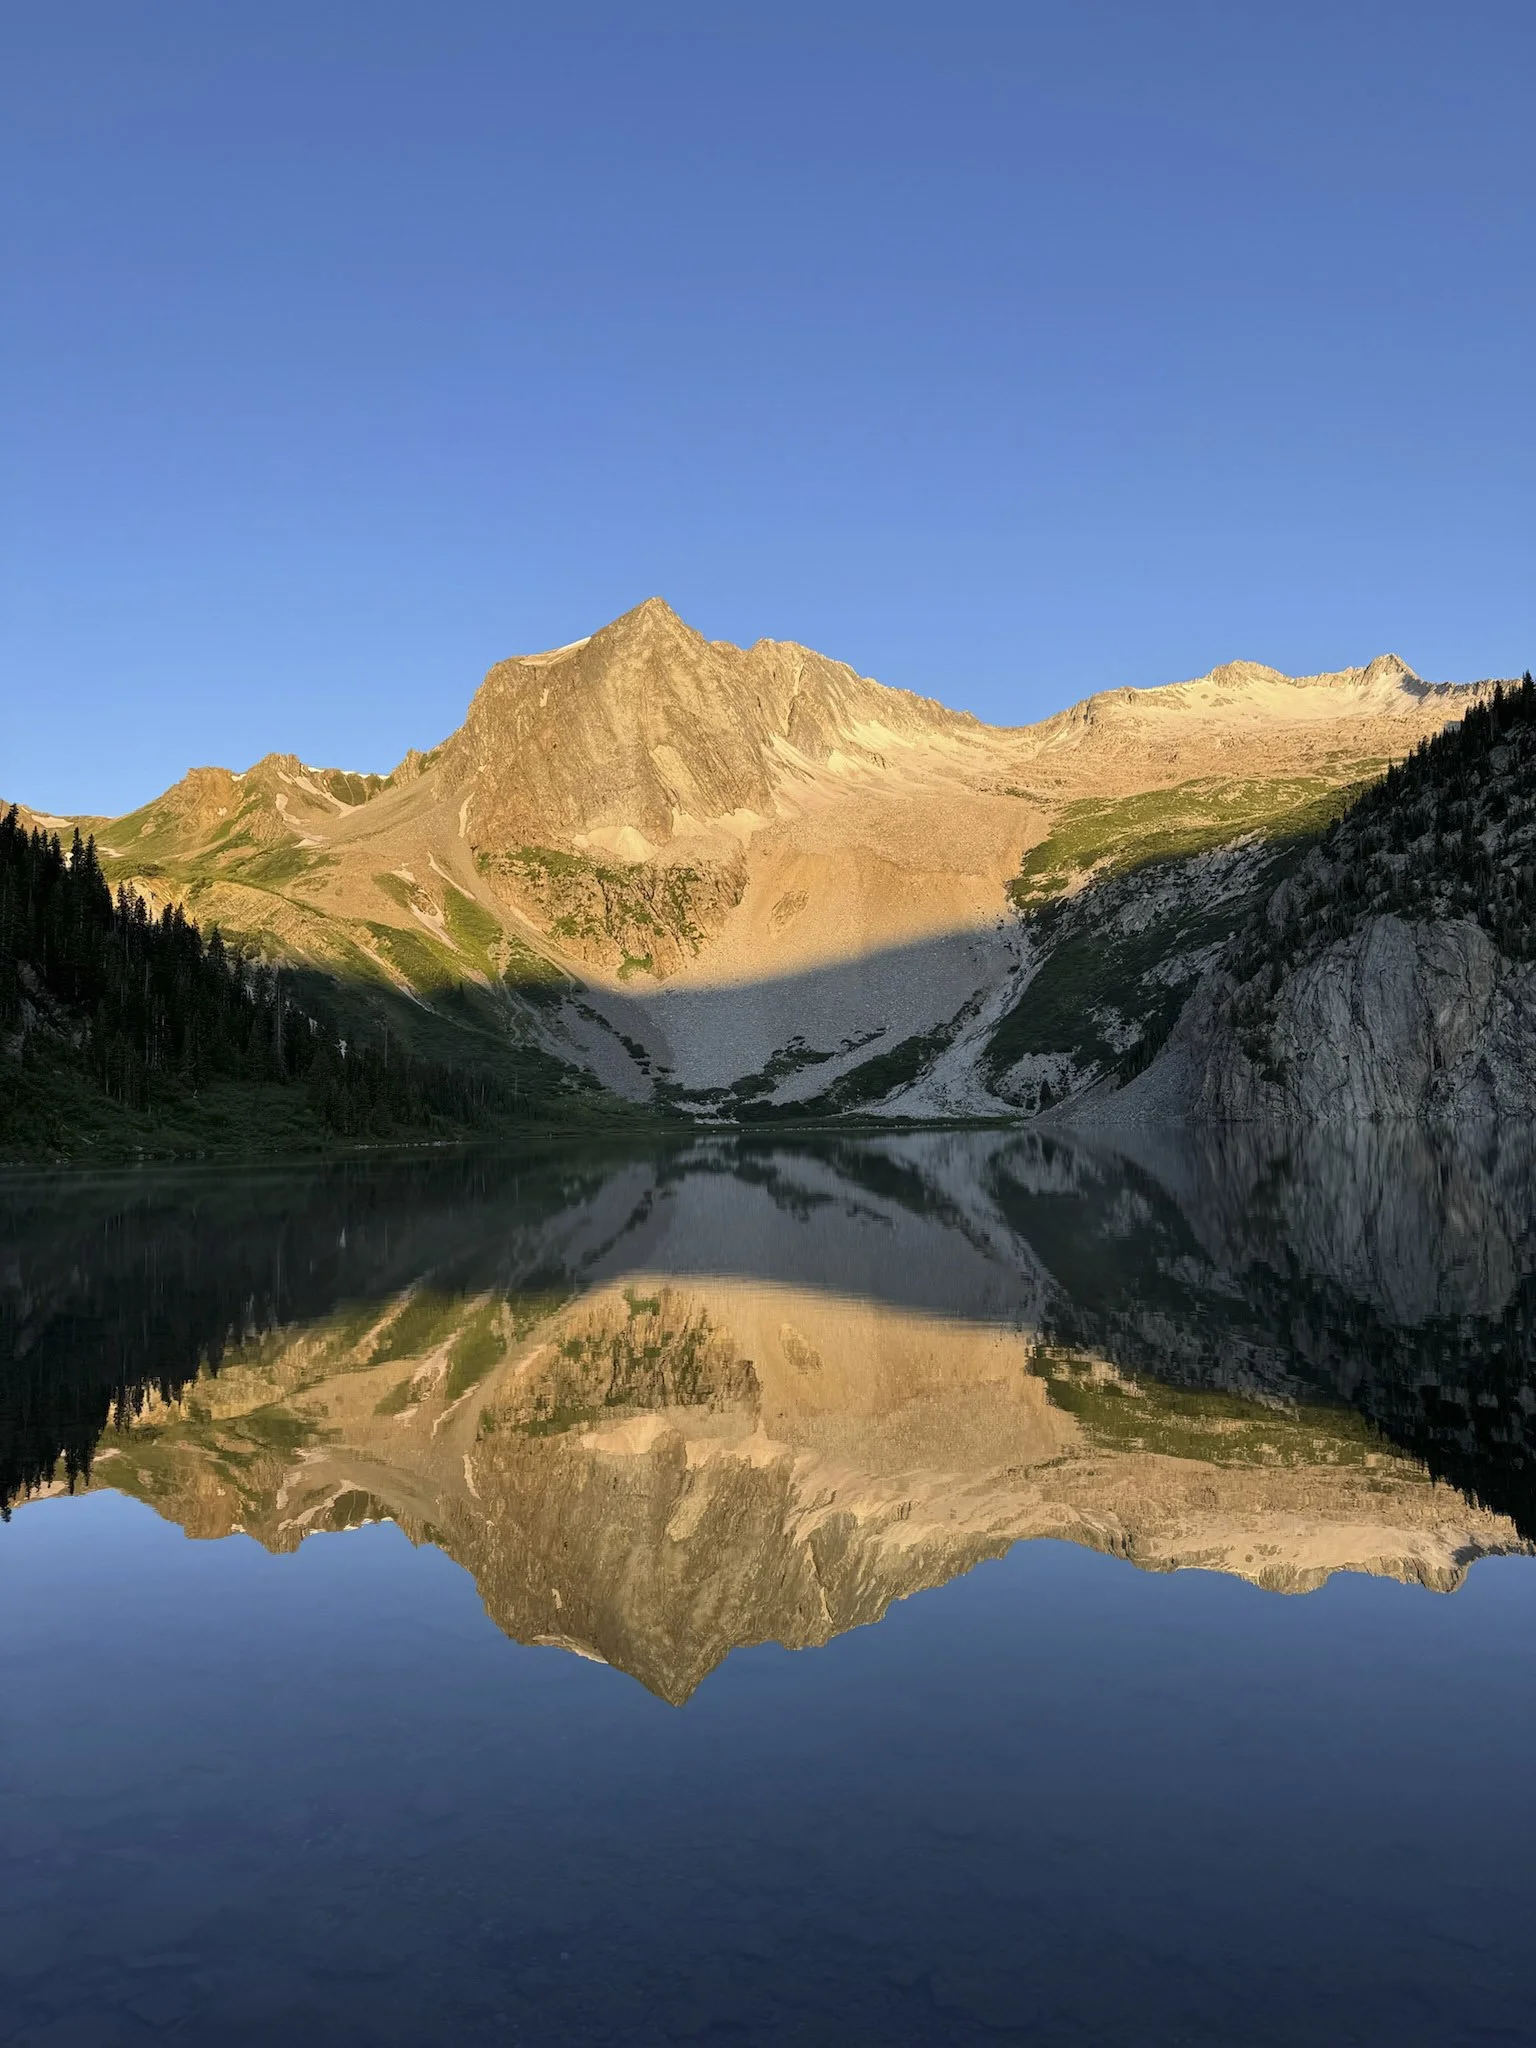
This is a magical trek— where the blue sky stretches endlessly above you, sometimes you feel like you can touch the clouds. Views that go on for miles with no signs of civilization. You’ll see a beautiful alpine lake, cross streams, and hopefully see some wildlife. With required permits keeping crowds in check, you’ll have plenty of opportunities for solitude, reflection, and raw adventure.
Whether you’re setting out solo, with a partner, or rolling deep with your crew, this trail will leave you with stories to tell and memories to last a lifetime.
In this post, I’ll cover:
✅ What the Four Pass Loop is – A quick overview of this legendary trail.
✅ Our Journey – A firsthand look at our experience on the trail.
✅ Logistics & Planning Tips – Permits, parking, what to pack, and more.
✅ Photos from the Trip – Get inspired by the stunning views!
📍 Want the full itinerary with daily breakdowns, campsite suggestions, and a packing checklist? Grab my detailed Four Pass Loop Guide on Etsy! It’s packed with everything you need to plan your own trip.

View from the start at 6am
Our Journey to the Four Pass Loop
So, how did we end up taking on this epic trail? Well, my husband and I live in the Denver/Boulder area, and we had a goal: complete a backpacking trip. We’re avid day hikers, often tackling trails up to 13 miles, but when it came to overnight backpacking, we were total beginners. Still, with our experience in hiking, running half marathons, and staying active in general, we figured—how hard could it be?
We stumbled across the Four Pass Loop in a book and immediately knew — this was it. Challenging, beautiful, remote. We invited my friend from high school, who is far more outdoorsy than us, to join in on the adventure. In 2022, we made our first attempt. We went counterclockwise, made it to Snowmass Lake, and… I was wrecked. The weight of my pack crushed me. I had never been so exhausted in my life. We pushed through rain, hail, and a little bit of sun, but by the second day, my body had nothing left to give. We had to turn around. It was devastating, but it was the right call.
Fast forward two years—this time, we came prepared. Actual training with a heavy pack. A solid game plan. A renewed determination. And in 2024, we conquered the Four Pass Loop. The feeling of finally completing this trek after years of dreaming about it? Unreal.
This journey pushed me way outside my comfort zone. I had no idea how to get permits, what gear to bring, how to plan each day, or where to camp each night.

Left : 2022 - 1st attempt. A few miles from Snowmass Lake. I was severely struggling.
Right : 2024 - 2nd attempt. Roughly the same spot, but this time I was feeling pretty good and recreated the photo just for fun! Training and a lighter pack were key!
Logistics : A Big-Picture Look at the Trail
This is a true backcountry experience, meaning no stores, no resupply points, and no easy way out. Once you commit, you have to finish the loop—one way or another. That’s not to scare you, but to emphasize the importance of planning so that once you're out there, you can relax, enjoy, and have the time of your life!
⏳ Clockwise or Counterclockwise? The Never-Ending Debate
One of the biggest planning headaches? Which direction to hike the loop. We wrestled with this question ourselves and ultimately went counterclockwise, based on advice from a guide at the visitor center. But here’s the truth: there’s no "right" way. People successfully complete it in both directions—it’s all about personal preference.
Things to consider when choosing your direction:
Elevation Gain & Loss: Take a look at the mileage and elevation profiles to decide what works best for your group. You’ll see this detailed on the next page.
Scenery Priorities: Personally, I thought Day 1 (Buckskin Pass ) and Day 2 (Trail Rider) had the most stunning views, which is something to consider when planning your pacing.
Trail Difficulty: No matter which way you go, you’re in for some big climbs, long descents, and moments where your legs will be screaming at you. (Yes, this pun was intentional.)
🏕 3 Days vs. 4 Days – How Long Should You Take?
We originally planned to complete the loop in 4 days, 3 nights, giving us extra time to soak in the scenery. But after our second night of camping, we made the call to push through and finish in 3 days instead. The final day turned into a long, exhausting trek, but it worked for us. If you want a more relaxed experience, splitting the hike into 4 days, 3 nights gives you more time to enjoy nature and recover between passes. We just didn’t find a campsite that really spoke to us, so we decided to push through and finish early. Your itinerary is flexible—adjust it to match your group’s comfort level!
PERMITS are REQUIRED year-round, and they sell out fast!
Feb 15th : Permits open for trips between April 1 - July 31
June 15th : Permits open for trips between August 1 - November 30
You can reserve your permit here
Before You Book Your Backpacking Permit
Create a recreation.gov account & log in – Don’t waste time scrambling when permits drop! Save your login info and credit card details in advance.
Align your trip dates & have backups – These permits sell out quickly, so pick alternative dates just in case. The best time to go is July through September, when most (likely all) of the snow has melted. There was still one snowy patch on the top of Buckskin when we went in July.
Read everything on the permit website – It’s a lot of information, but you’ll need to understand the process before permits open on Feb 15th and June 15th. When booking, you must select your overnight camping zones, meaning you should know how far you plan to hike each day and in which direction.
After You Book Your Backpacking Permit
Now that you have your permit, it’s time to figure out how to get to the trailhead.
Shuttle Option: You can take a shuttle from the visitor center, but you’ll need to purchase a shuttle pass.
Driving & Parking: If you prefer to drive, you’ll need to reserve a parking spot at the trailhead. Parking rules change frequently, so be sure to check the latest information here
💡 Pro Tip: Once you book your permit, check your confirmation email for parking instructions and a reservation number. You’ll need this to add parking to your pass, so rangers know your vehicle is accounted for. Standard parking passes won’t give you enough time to complete the hike, so make sure you book the right parking pass for overnight use!
Favorite Items
Some of my favorite items that we used on this hike and most of our other hikes as well (even day hikes)
Spikes (if snow or ice is possible)
Hydration system
I’m a sucker for headlamps - I actually even wear it around the house sometimes when I’m doing crafts. It makes life so much easier. My husband makes fun of me…. (probably rightfully so)
even though you’ll have a rain cover for your backpack - things happen and you definitely want to have some dry clothing. I pack as much clothing as I can in this thing. I’ve also taken this bag paddle boarding, kayaking, day hiking, etc.
I love this watch! I’ve always had garmins but opted to try something new since I’m on a budget. This is the perfect watch. It has just enough gadgets but not too many. Battery life is great. My husband has a garmin and we both like my Coros Pace 3 better.
Garmin inReach (or another emergency device)
I’m honestly not super familiar with these types of devices, our friend Cody had one that he brought with him. Definitely do your own research, but I’d highly recommend some sort of emergency device. You will NOT have cell service.
Want a Done-for-You Itinerary?
Planning a trip like this can feel overwhelming—so I’ve made it easier!
🎒 Grab my Four Pass Loop Backpacking Guide on Etsy 📍
It includes:
✅ Daily Itinerary & Campsite Suggestions (with gps coordinates)
✅ Packing List & Gear Checklist - I’ve broken this out to include the essentials for each person and the essentials for each group. We made the mistake the first time taking multiples of certain items when we could have just shared.
✅ Safety tips
✅ Downloadable Packing Checklist - customizable checklist with my recommended packing essentials (google sheet format). The document adjusts automatically based on the duration of your backpacking trip, helping you pack the right amount of gear for any number of days.


Disclaimer : This guide is based on my personal experience hiking the Four Pass Loop. I am not a certified guide, nor do I claim to be an expert in wilderness survival or backcountry safety. While I’ve done my best to include helpful planning tips, gear recommendations, and personal insights, this guide may not cover every possible scenario or every item you might need. Conditions can change, and each hiker’s needs, experience level, and risk tolerance will vary. Use this guide as a reference, but always do your own research, check current conditions, and make decisions based on your own comfort level and preparedness. By using this guide, you acknowledge that hiking and backpacking involve inherent risks, and I am not responsible for any injuries, lost gear, bad weather surprises, or wrong turns along the way. You hike at your own risk.
Copyright Notice - All content in this guide—including written material, photos, and personal insights—is copyrighted and owned by me. Reproduction, redistribution, resale, or unauthorized use of any part of this guide, including images, is strictly prohibited. If you’d like to share information from this guide, please provide proper credit and a direct link to the original source.
Thank you for respecting my work—now go enjoy your adventure!